DIGITAL BODY 2.0 LAB PROCESS - LAKE STUDIOS BERLIN - 2022
My project at Digital Body 2.0 was the second iteration of the process I began during my Pro-Helvetia residency at Rote Fabrik in Zurich earlier in the year. In response to the rectangular volume 14m(L) x 8m(W) x 4m(H) of the studio space at Rote Fabrik I had designed the installation for frontal viewing. I aligned the different elements - the camera, the performer(s), the motion tracking device, the lighting, the beamers and projection screen (1.52x3m) - along the depth of the rectangular space. Using short throw (0.5:1) projectors enabled to back-project on the screen and front-project on the back wall while allowing the performers greater flexibility of displacement without beaming their shadows onto the surfaces. The ample depth also permitted to illuminate the performers with minimal spill on the projection surfaces.
Initial concept for a multi-directional dispositif - Digital Body 2.0
Multi-directional space - Partial visibility & obstruction
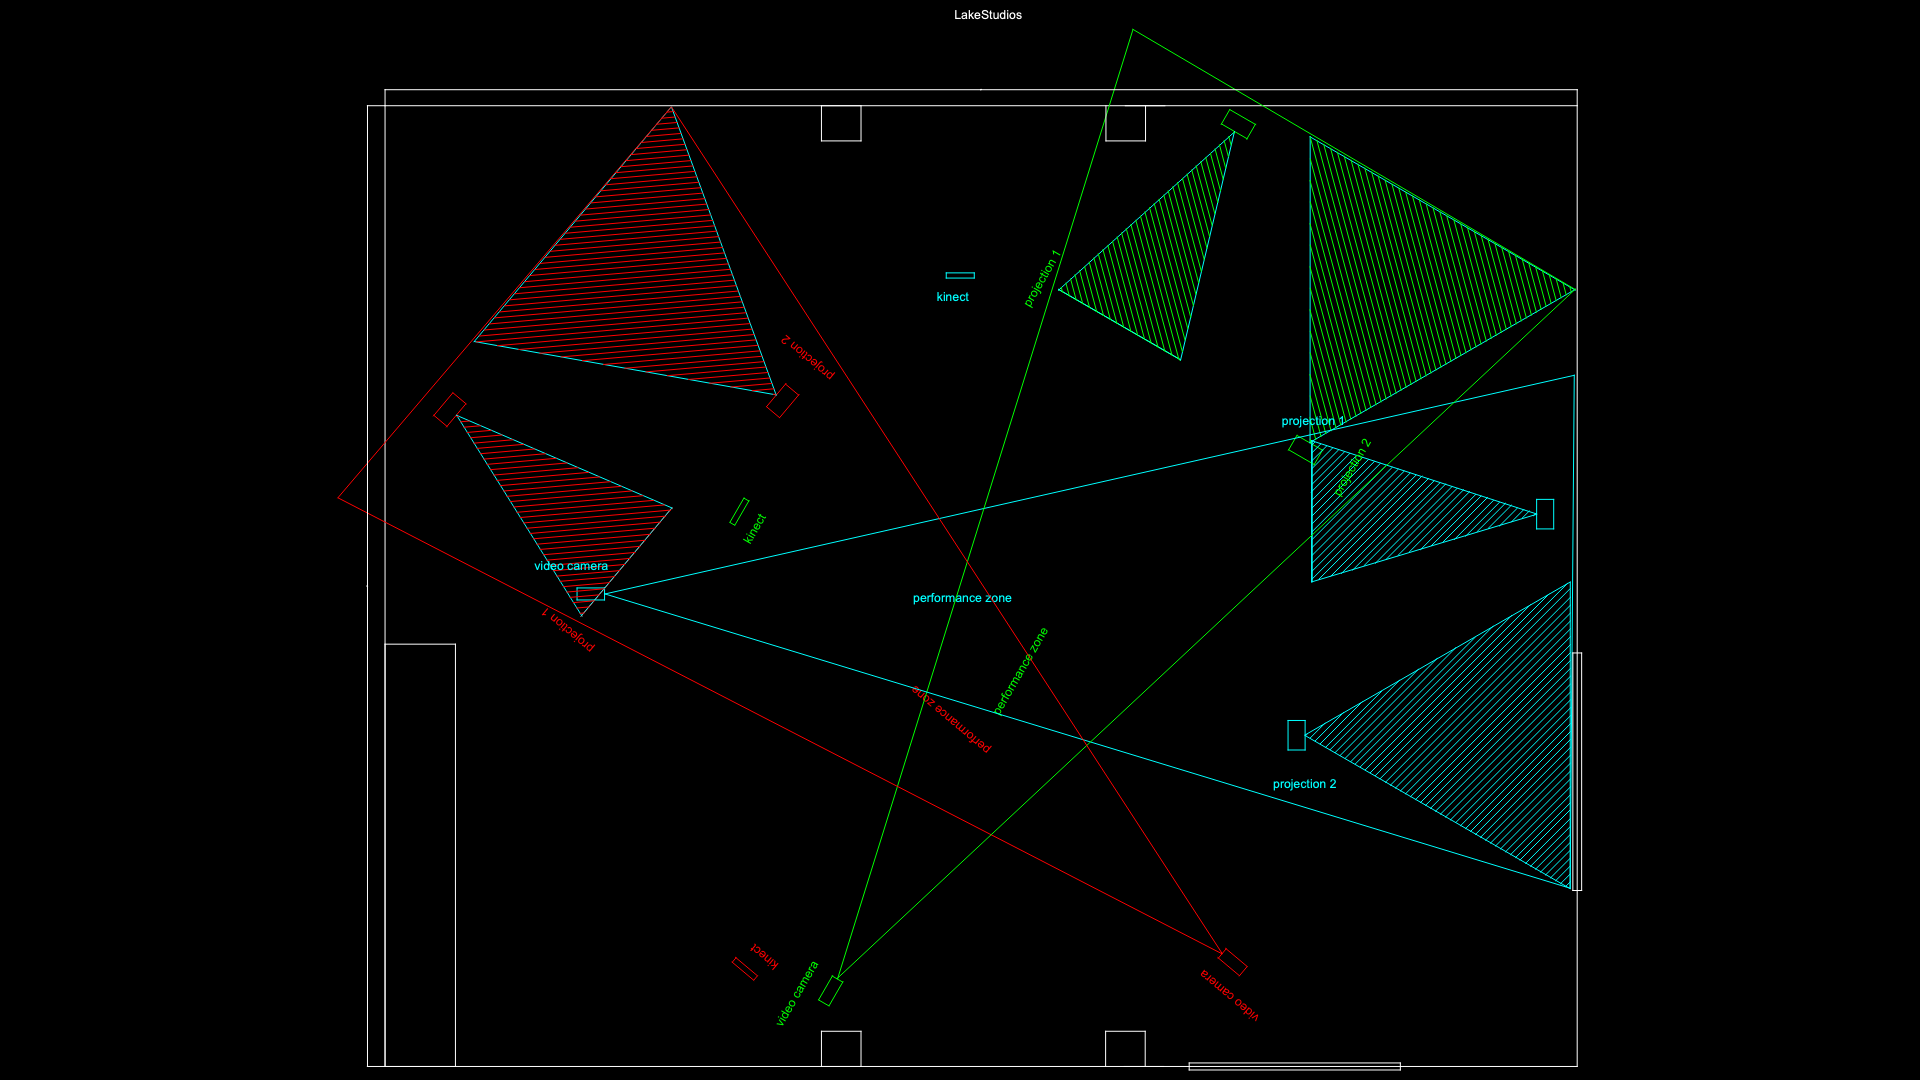
For the big studio at Lake Studios 14m(L) x 10m(W) x 3m(H) I intended to make the system multidirectional by placing the installation at the centre, tripling the axes, rotating them to different angles and separating them to form in-between spaces of partial visibility and obstruction. The performers bodies would be partially visible or partially obstructed either directly or by projected image depending on their position/displacement and that of the audience.

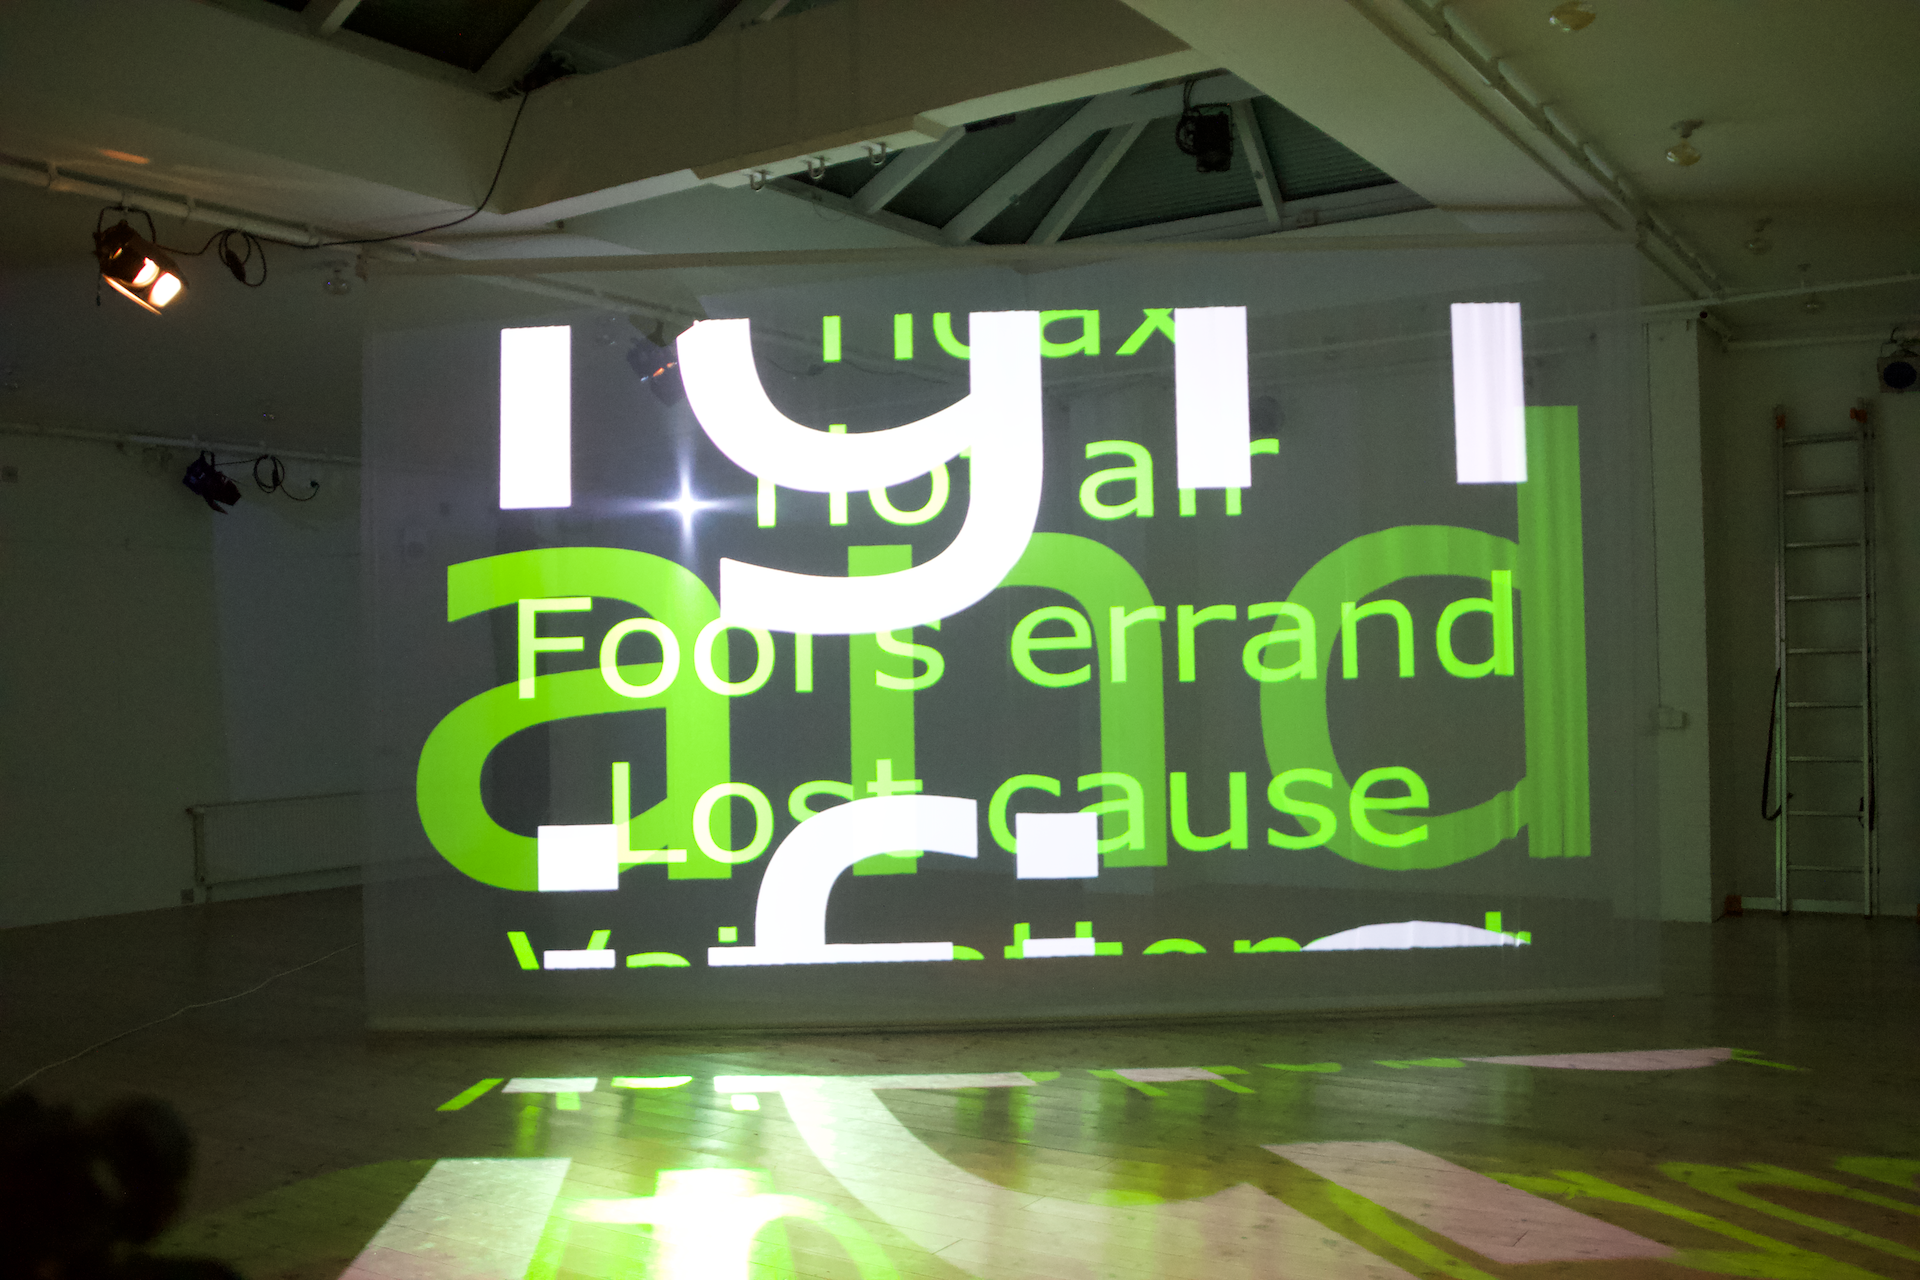
Laser Gauze: While for the residency at Rote Fabrik I had simply used a stretch of white fabric and studio walls for projection the facilities at Digital Body lab included more lighting as well as a 5x3m stretch of fairly transparent laser gauze. Due to the translucide nature of the material it felt a lot less like there was a wall in the middle of the space. Depending on the lighting performers would be visible through the screen.
This in principle opened up new avenues to explore but the high transparency presented different challenges in relation to the more opaque surfaces on which I had developed the process thus far. Subtle imagery and colours were rendered fade, less visible even when using a brighter projector than my reference 3500 lm short-throw Optoma. The brighter the projection source the more light & image we had shining through the gauze. For my system to function the performer needs to be lighted without the light spilling around the space. Relatively low ceiling height restricted possible points of installation for both the video projectors and lighting fixtures. The high transparency of the gauze also meant any lighting sources (video projectors or lighting fixtures) behind the gauze would shine through washing out the projection.
Adapting to these conditions influenced part of my inquiry at Digital Body. What worked quite superbly in this context was text and high contrast graphic content. The gauze may have been more suited for laser projection.


The technical challenges alluded to here would have been simpler to resolve if it wasn’t for the fact there were 11 other lab participants with projects that needed to share the same space and facilities on a daily basis. To address some of these issues the Lab acquired 11m of Gerriets Opera - front & rear - projection pvc that we cut into 3 screens that, in combination with the laser gauze, I used to set up a multi-directional space.
Multi-Mode - Autonomous, Interactive or Performance Installation
Using noise algorithms (Noise TOP in TouchDesigner) to randomise the displacement of feedback pixels I’ve conceived the system to be partially self generative and partially reactive to external stimuli. Feeding only on light and colour when the space is empty, reacting to audio when there is sound or bodies when space is occupied by dancers. This should make it function as an autonomous, interactive or performance installation.
Colour - Light, Camera, Sound
The colour of the visual texture tended to default towards red. Someone suggested this dominance may have been a bias of the Sony camera. Reflecting on it I realised low intensity halogen lighting may have been responsible. To limit the amount of lighting spilling onto the screen it had been necessary to tend towards subtle low intensity lighting.
‘Incandescent lights naturally boost reds as they get dimmer and the temperature of their filament gets lower.’
The camera was picking up the red while the feedback & pixel displacement systems were repeating and amplifying it in a recursive loop. By either using lighting as a source or introducing different colours in TouchDesigner I developed this phenomenon into a way of generating washes of colour that I projected on the screens by simply manipulating audio frequency, light intensity and camera aperture.